Your Phone Is the Cheapest Coach You'll Ever Hire: A Filming Routine for UK Wakeboarders

Photo: The Tech Cheat, CC BY-SA 4.0, via Wikimedia Commons
You finish a set. Your arms are cooked, your ears are full of water, and you're fairly sure you just edged really hard and popped off the wake properly. Then someone shows you a video and it turns out you were standing up straight, arms bent, board flat, drifting sideways like a shopping trolley on ice.
That gap between what you felt and what you did is where most beginner progression goes to die. And it's a gap a phone can close in about two minutes.
We're not talking about building a YouTube channel. This is about a small, boring, repeatable routine that turns each set into feedback you can actually use — especially in the UK, where most of us ride cable, sets are short, and coaching time is precious.
Why memory is a terrible witness
Wakeboarding happens fast and mostly behind you. Your brain is busy keeping you upright, so it quietly fills in the gaps with what it thinks happened. Ask five riders to describe the same crash and you'll get five different stories, all delivered with total confidence.
Video doesn't argue. It just shows you the handle drifting away from your hip, or your shoulders opening early, or the tail washing out because you loaded the edge too abruptly. You don't need a sports scientist to spot that. You need a decent angle and the willingness to look.
Set up once, film all season
You don't need kit. A phone, a cheap clamp or a tripod, and something to prop it against will do. A few practical notes for UK parks:
- Ask first. Most cable parks are relaxed about a phone on the dock, but check with staff before you clamp anything to their rails. Nobody wants your tripod in the water.
- Shoot landscape. Wakeboarding is a horizontal sport and your handle-to-hip relationship is a horizontal story. Portrait video cuts off exactly the bit you need.
- Use 1080p at 60fps if your phone offers it. Smooth slow-motion of the wake approach is worth more than extra resolution you'll never zoom into.
- Keep the phone warm. A cold January morning will drain a battery faster than you'd believe. Tuck it inside your jacket between sets.
- Film the start, not just the hero moment. The first three seconds off the dock tell you more about your stack than the landing does.
The three angles that earn their keep
You don't need a cinematographer. You need three simple views, and you'll only use one or two per session.
1. Side-on from the dock or bank
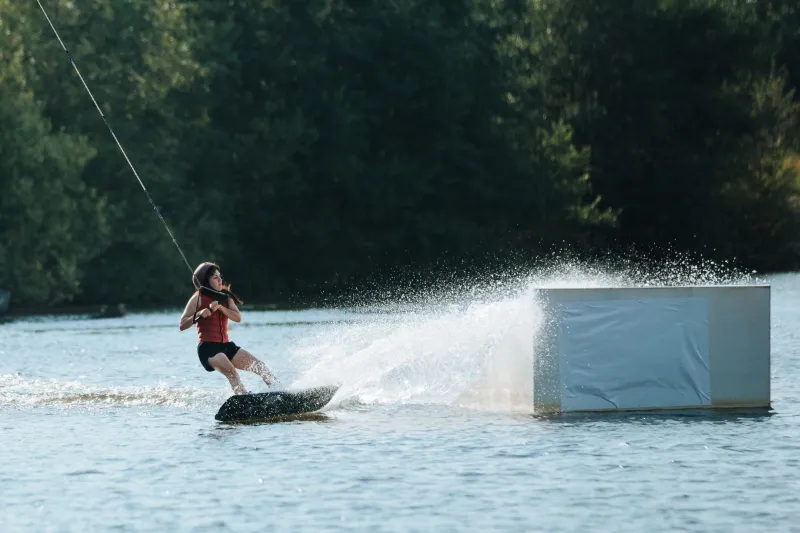
Phone at roughly hip height, perpendicular to the direction of travel. This is the money angle for body alignment — you can see whether your hips are over the board, whether your chest is open or collapsed, and whether your arms are doing the work your legs should be doing.
2. Behind the rider at a corner
If your park has a turn, a shot from the inside of the corner catches edge control beautifully. You'll see whether the board is tracking cleanly through the load or skidding, and whether you're building the edge progressively or slamming it on all at once.
3. Long lens from the opposite bank
For wake jumps, distance is fine — just don't try it hand-held while shouting encouragement. Prop the phone, frame the wake, press record, walk away. A slightly wide shot of your approach and pop is far more useful than a shaky close-up of your knees.
Review like a coach, not a critic
Here's the rule that makes this work: watch the clip three times, then stop.
- First pass — feel. Just watch it. No judgement. Notice what surprises you.
- Second pass — pause on the approach. Freeze two or three frames. Where are your hands? Where are your hips? Which edge is engaged?
- Third pass — the outcome. Watch the landing or the fall and ask what the approach was already telling you.
Then pick one cue. Not three. One.
"Hands stay low and near my hip." "Hips over the board, chest up." "Wait for the load before I stand tall." Write it in your notes app with the date. That single sentence is your entire plan for the next set.
What to actually look for
You don't need to become a technique nerd overnight. Start with these three checks and ignore everything else.
Handle position. Are your arms straight and the handle close to your leading hip? Or has it crept up towards your chest, pulling your shoulders round and killing your edge? The handle creeping in is the single most common beginner tell, and it's almost invisible from the rider's seat.
Edge control. Is the board carving a clean line, or is the tail skipping? A progressive edge builds through the corner. A sudden edge is a brake. On video, one looks like a knife and the other looks like a handbrake turn.
Body alignment. Stack the joints: hips over the board, shoulders over the hips, head up. If your shoulders are behind your hips on the approach, no amount of handle-waving will save the jump.
Turn clips into cues between lessons
A fortnight between lessons is normal in the UK, especially outside the summer. Don't let it be a fortnight of nothing.
- Keep a single folder on your phone for riding clips. Delete the rest. Forty videos and no notes is just scrolling.
- Label each one with the date and your one cue. Water temperature and board size are nice extras if you're testing kit.
- Show your coach twenty seconds, not the whole session. Before your next lesson, hand them the clip of your worst habit. You'll skip the diagnosis phase and spend the hour fixing rather than identifying.
- Re-film the same angle each time. Comparing like with like is how you'll actually see progress — and on a cold February set, seeing progress is the whole point.
The mistakes to avoid
Filming from eighty metres away. Filming only the crash. Vertical video. Watching forty clips in bed and going to sleep confused. Trying to fix four things at once.
And the big one: using video to beat yourself up. The clip is information, not a verdict. You're not auditioning.
One angle, one cue, one set. That's the routine. It costs nothing and it works faster than most of the gadgets people buy instead.